As typical in SharePoint, there is usually more than one way to solve an issue. The first way to create an A-Z quick filter is to "hard wire" the solution based on views created when you manually filter a column. For more information on how to do this, refer to:
- SharePoint StackExchange's solution: Page a list via A-Z
- The Salty PC's solution: Create an A-Z quick filter web part
However, JavaScript is the more versatile solution. The plus side of using JavaScript is that you can re-use this code on any site and any list without rewriting the code.
The solution below is applicable to SharePoint 2010 and 2013, but can be applied to SharePoint 2007 using the code at Alphabetical List View Quick Filter by Boris Gomiunik. If you view Gomiunik's site, he goes into the nitty gritty details of the javascript, so I won't repeat his actions, as he does a great job explaining it!
This post provides the instructions on how to implement the solution.
- Create your SharePoint list.
- Open Notepad, copy the code below, and paste it into a new file. (Thanks to Aleksandr for updating the code to SharePoint 2010/2013 requirements, as posted on PasteBin at Nilldot: SharePoint list alphabetic order.)
- Save this file as .txt and upload it to the Site Assets library on the site where your list is saved. You may have to click Site Contents on the quick launch menu on the left to see the Site Assets library.
- Right click on the file now on SharePoint, and click Copy shortcut to get the URL of the file.
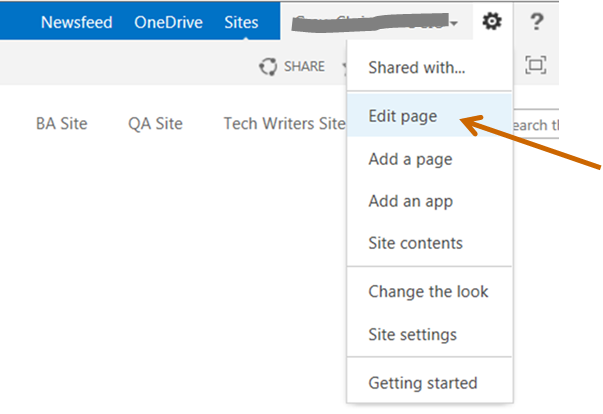
- On the page of the list you credit in Step 1, click the cog in the upper-right corner of the page, and click Edit page.
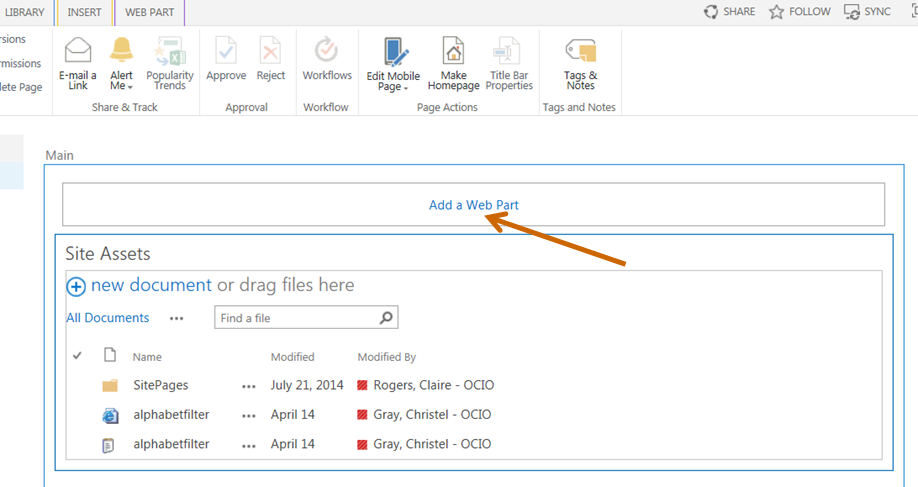
- Click Add a Web Part.
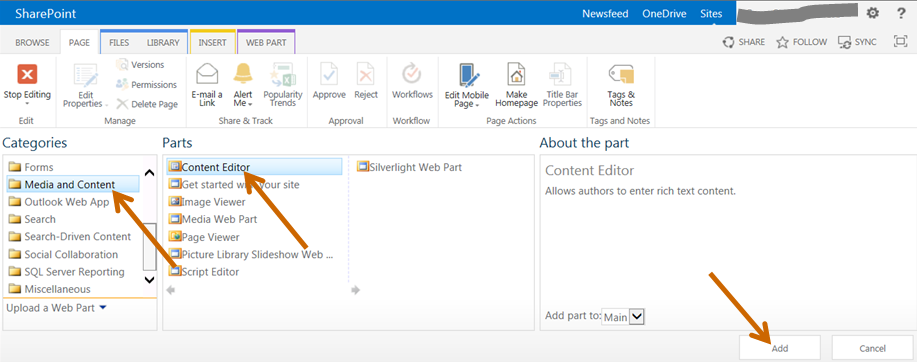
- In the Categories window, click Media and Content. Select Content Editor, and click Add.
- Click the drop-down arrow on the new Content Editor Web Part and select Edit Web Part.
- In the Content Editor properties box, paste the URL for the *.txt file you copied in Step 3 in the Content Link field. Click Test Link to ensure the *.txt file opens. Click OK.
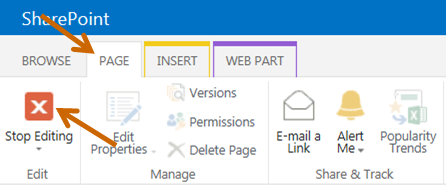
- Click the Page tab and click Stop Editing.
- Activate the list menu by clicking somewhere in the list area (below the Content Editor Web Part, but not on a list link).
- Click the List tab, and List Settings.
- Under the Columns section, click Create column.
- Name the column FL (this is linked to the code line var filterField = "FL" above and stands for first letter). For the Column type, select Calculated (calculation based on other columns). In the Formula field, type =LEFT and double click the column name (in the Insert Column box) from which you want to grab the first letter. Add parentheses around the outside of the column name brackets, and remove the brackets. Click OK.
For instance, in this example, I want to filter by the first letter of the Term column, so my formula looks like this: - Go back to the list page and test your alphabetical quick filter links!
- <script type="text/javascript">
- function qs(paramName) {
- var args = document.location.search.substring(1).split("&");
- for(j = 0; j < args.length; j++) {
- nameValues = args[j].split("=");
- if(nameValues[0] == paramName) return nameValues[1];
- }
- return null;
- }
- var filterField = "FL";
- var filterValuesDelimiter = " - ";
- var filterValues = new Array
- ("A","B","C","D","E","F","G","H","I","J","K","L","M","N","O","P","Q","R","S","T","U","V","W","X","Y","Z");
- var selectedValueStyle = "font-weight: bold;";
- var filterDivStyle = "margin: 5px; font-size: 15px;";
- var filterLinks = new Array();
- for (var i = 0; i < filterValues.length; i++) {
- filterLinks.push('<a ' + (qs("FilterValue1") == filterValues[i] ? 'style="' + selectedValueStyle + ' ' : '') + 'href="' + document.location.pathname + '?FilterField1=' +
- filterField + '&FilterValue1=' + filterValues[i] + '">' + filterValues[i] + '</a>');
- }
- document.write('<div style="' + filterDivStyle + '">' + filterLinks.join
- (filterValuesDelimiter) + '</div>');
- </script>